Updating AMT Software
| While Avanade makes every effort to ensure the quality of the updates provided, our internal regression testing cannot always cover specifics to your own environment's setup. In order to ensure the correct functioning of your production environment, we recommend creating a backup of the entire AMT installation and applying an update to a separate or actual standalone development or test environment before applying an update to your production environment. |
AMT Update Releases
The regular release schedule for AMT software updates is every 3 weeks.
AMT software releases are numbered incrementally (AMT99, AMT100, AMT101, etc.)
and their respective update files' naming convention, as illustrated below, start with AMT_, followed by the
version number, and have the .dat file extension.
In rare cases, a fix to a release will be available that can be recognized by the postfix Fix_# in
its filename.
| Release Name: | AMT101 |
| Filename: | AMT_101.dat |
| Filename Fix: | AMT_101_Fix_1.dat |
Preparation
- Stop all AMT related programs
Ensure that no users are currently connected and then shut down all AMT services and AMT related programs. Also ensure that the Generator Service is no longer running. - Stop the IIS Manager Application Pools
All Application Pools running the AMT web applications need to be stopped before starting the setup. If possible, stopping the IIS Manager is preferable to make things easier. - Unregister AMT COM Services
When making use of the AMT Com Module or AMT ComScript Module as COM service, these services need to be unregistered before the installation of an update. See the provided help pages for more information about unregistering. - Make a backup of your complete AMT installation
We highly recommended creating a backup before starting setup. The relevant directories to back up are:- The Lion directory
- The application directories
- The web.config and appsettings.json files for the Control Center, the Application Center, and their respective Web APIs.
- Download the latest release for AMT
Download latest AMT software release from the Avanade Service Portal found here: https://amp.service-now.com/legacytransformation/. - Read the Upgrade Checker section on the Release Notes website
Visit the AMT Release Notes website and select Upgrade Checker. Please review the release notes that require special attention by using the slider to select both the installed AMT version and the newer release version.
| It is important to first unregister the old ComScript module when updating the AMT software and then register the new version (except when all your scripts are PowerShell scripts). |
| It is also advised to make backup copies of the appsettings.json files of AMT Web Applications: Control Center, Application Center and Blazor Web Clients. Both Frontend and Business Logic side. This makes it easier to retrieve any changes made to these files and incorporate these into the new appsettings.json files. |
Installation
- Copy the downloaded Setup.exe and the .dat update file into the Setup directory (the ..\<AMT_Environment>\Setup directory).
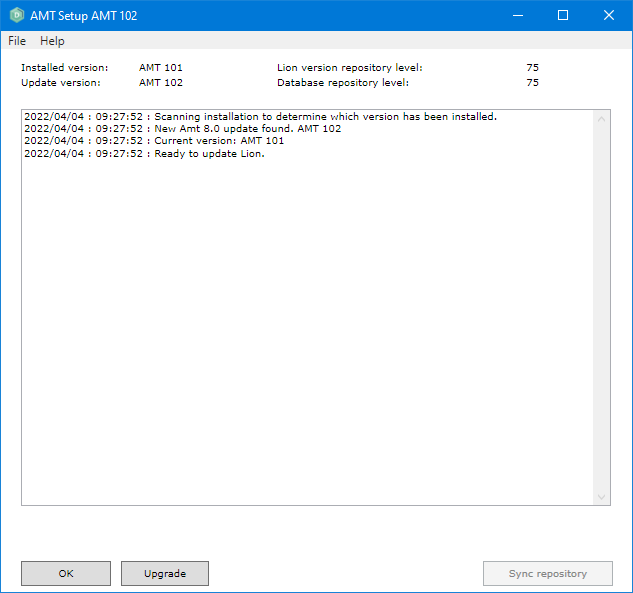
- After the files have been copied into the Setup directory,
run Setup.exe. Setup will first attempt to detect an already
installed AMT environment in its directory. The setup log will state "Ready to update Lion" after detection has
completed. Select the Upgrade button at the bottom of this window to start the
installation.
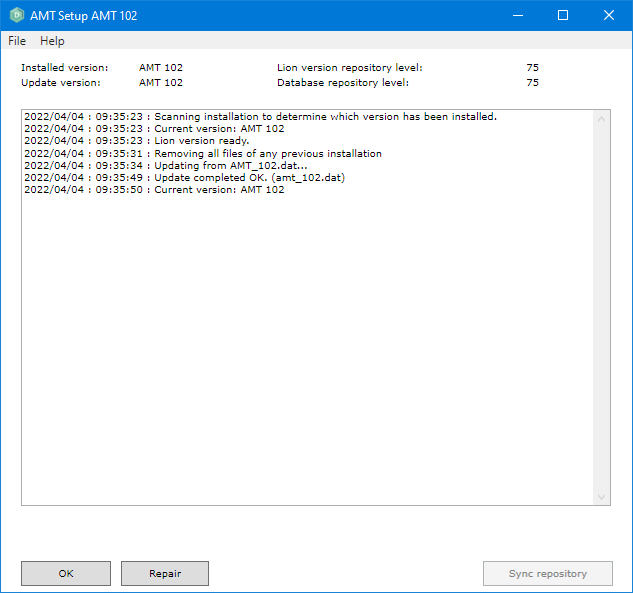
- The setup log will state "Update completed OK" and lists the currently installed version when setup has finished
successfully.
- After the update has completed we need to renew the IIS Mappings of the installation by navigating to
File > Settings. The window shown in the following image will
open.
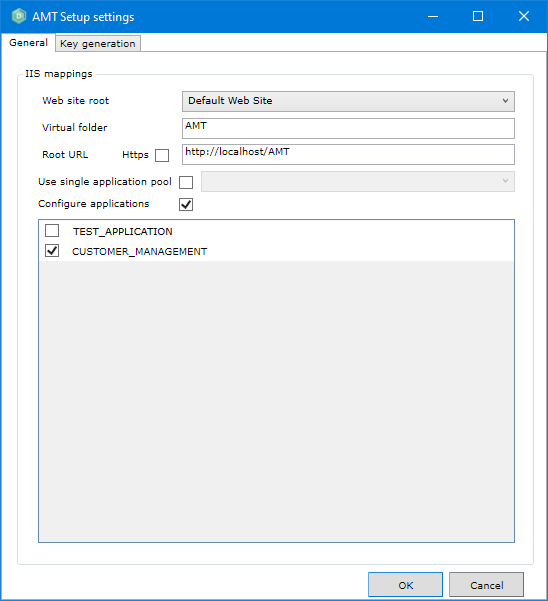
- Check whether the presented IIS Manager mappings settings that will be used are correct. Note: The options
Use single application pool and Configure applications are only to be used in
simple development environments where Prodinstall.exe is not
used.
- Use single application pool: When checked, all web applications will use a single application pool. The application pools can be selected from the drop down menu. However, this is not advised in a production environment. When one application fails, all other applications using the same pool will fail also.
- Configure applications: When checked, all selected web applications will be configured inside the IIS Manager. This will only work for development environments where Prodinstall.exe is not used and the applications are directly generated into the Apps directory.
If this AMT environment needs to make use of the HTTPS protocol for communications to the AMT web applications (AMT Control Center, AMT Application Center, etc.), the full domain name of the server that will host the AMT web applications should be entered as Root URL prefixed by https. For example: https://amt.example.com/ or https://amtweb.contoso.local/.
Enabling the Https checkbox will configure the web.config files of the AMT web applications correctly for use with HTTPS. However, enabling HTTPS for the IIS Manager web application must be performed manually in addition to setting the correct bindings and adding a valid certificate. - When everything has been configured, select Ok. A prompt will ask you if all the
web.config files should be configured. Select Yes.
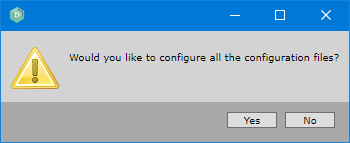
After selecting Yes, a second pop up will appear asking if the IIS environment should also be configured. Select Yes.
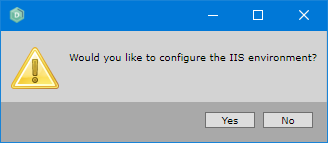
After selecting Yes, the progress of configuring the IIS Manager will be shown in the general logging tab.
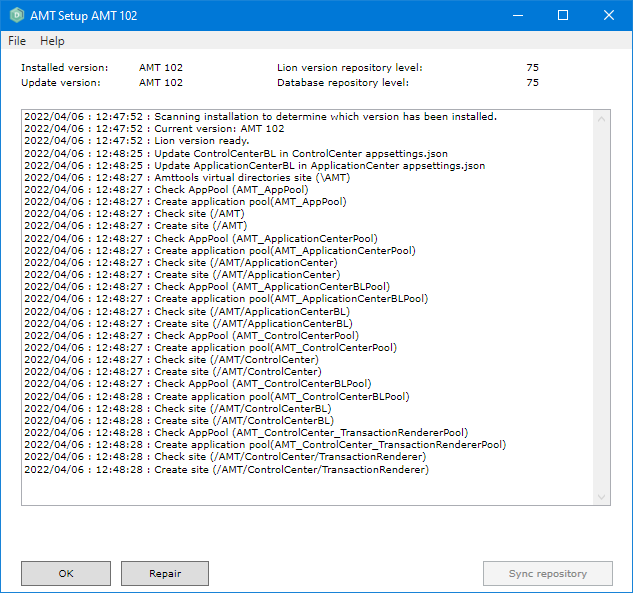
- When the Sync repository button has been enabled (not greyed out) it is necessary to reorganize the repository by clicking this button.
- Click Ok to close Setup.
Although setup has completed, several more steps are necessary to finalize installing the update.
Final Steps
- Firstly, reorganize the system database by starting the AmtReorganize.exe found in the ..\<AMT_Environment>\AmtTools\Reorganize directory. Select System as the database to reorganize.
- Start the AMT Developer Studio program by
running LionDev.exe and start the
Generator Service.
- Select the button Whole system to generate all applications.
- When the whole system generation has completed, the application installer will have to be used to install your application on the production environment.
- Reorganize all application databases.
- Compare the existing configuration and configuration files with the default/sample or backed up versions to ensure that new or removed sections are reflected in the used configuration and setting files. For example, the appsettings files of the web applications, the localization files or the AmtTools Prodinstall and Reorganize Service configuration files.
- Start the application pools for the web application or start the IIS Manager server if it was stopped.
- Re-register the AMT COM services if necessary (AMT Com Module and/or AMT ComScript Module).
- Finally, start all AMT services. The updated AMT environment is now ready for use.
Downgrading
It is possible to downgrade to an older release when an older file version is present in the Setup directory. Note: Setup will install the newest version available in the Setup directory. It is therefore required to move or delete files with versions newer than the version you wish to downgrade to.To begin, start the Setup by running Setup.exe. The latest version found in the Setup directory (..\<AMT_Environment>\Setup) will be installed. Select the Downgrade button to start the process.
AMT component versions
To verify the versions of all AMT component libraries and executables, navigate to the menu File > Versions of the Setup tool
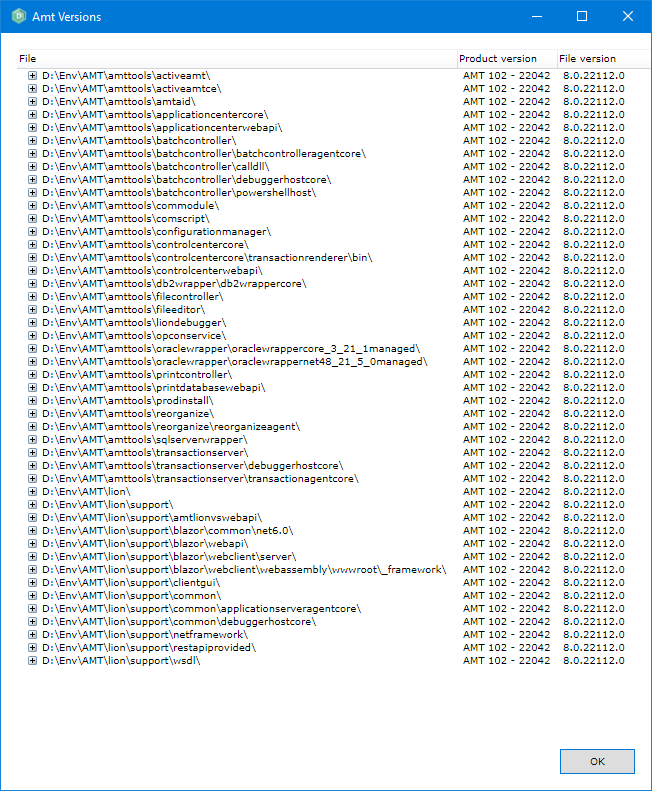
This window shows all the libraries and executables under the directories of their components.
In case a fix has been applied to the AMT environment, the updated component will display a higher version than the rest of the components. The parent node will show the highest version of the items below it.