Triggers
DML (data manipulation language) triggers on tables can be created in the AMT Developer Studio from the 'Triggers' node available in Database Table objects.
Please note, triggers are not supported on OS2200 DMS database tables.
Creating a trigger
To create a new trigger, do the following:
- Open the table definition on which you want to define the trigger and select the "Triggers" node.
- Ensure that the table is locked by selecting the lock button in the top toolbar.
- Select the option "Add new trigger" from the right-hand pane. The following screen appears:
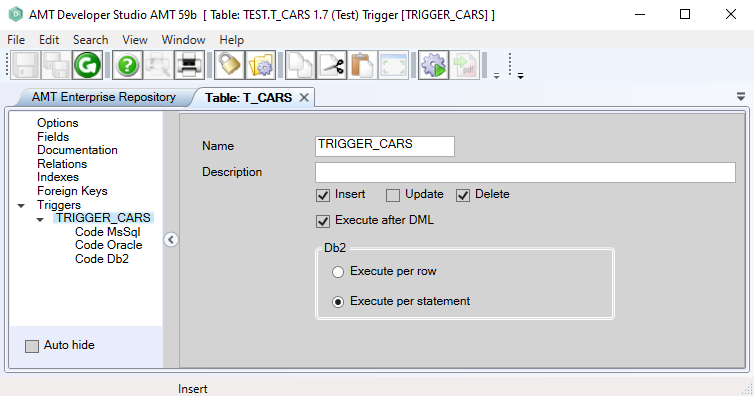
- To complete the specification, see "Adjusting a trigger" below.
Adjusting a trigger
- Select the trigger you want to adjust from the "Triggers" node.
- Ensure that the table is locked by selecting the lock button in the top toolbar.
- Set the properties for the trigger as described below:
|
Option: |
Description: |
Value: |
|
Name |
Name of the trigger. |
<Text> |
|
Description |
Description of the trigger. |
<Text> |
|
DML action |
Select the DML action(s) that executes the trigger. Multiple actions can be selected if supported by the database type used in your runtime environment. |
<Insert|Update|Delete> |
|
Execute after DML |
If checked, the trigger will execute after the DML action has been performed. If not checked, the trigger will execute before the DML action. |
|
|
DB2 - Execute per row - Execute per statement |
For DB2 databases only: Please note that this option is dependent on which type of database is used in your runtime environment:
|
|
- The trigger SQL code can be set in one of the code nodes belonging to the correct database type, see the code help page for more information.
- On completion, click the save button in the top toolbar of the Developer.
- The table must be checked in first before it can be generated.
Deleting a trigger
- Open the table definition on which you want to adjust the trigger and select the "Triggers" node.
- Ensure that the table is locked by selecting the lock button in the top toolbar.
- Select the trigger to delete and right-click on it, then select "Delete" from the pop-up menu (or press Delete on the keyboard).
- On completion, click the save button in the top toolbar of the Developer.
- The table must be checked in first before it can be generated.
Generate the application and reorganize the database
After a trigger is added, adjusted or deleted, a Whole System generate is required, followed by a database reorganize.
| Triggers that were manually disabled, will be re-enabled by a database reorganize only when the columns in the triggers have been changed. Unchanged triggers will not be re-enabled by a database reorganize. |
In the code nodes, the SQL code of the trigger can be set.