Using the AMT Application Installer
The AMT Application Installer can be used to deploy the generated application executables and support files from the source directory to the production directory of your environment. The AMT Application Installer executable (Prodinstall.exe) is situated in the AmtTools\ProdInstall directory of the AMT-COBOL environment. When started for the first time the configuration is empty. It can be filled with data by adding Gensets, Applications and directories in the Application Installer. For applications made before AMT 44, clicking the 'import settings' button will load information about all the applications, generation sets including source and production directories from the Lion.ini file. This information is then used when deploying newer versions of the executables and support files from the source directories to the production directories and saved to the AmtProdInstall.config file.
| The application installer is organized in objects, i.e. Forms, Programs, SubPrograms, etc. An object may therefore contain multiple files and when an object is selected for copying to the production folders all the files in that object will be selected for copying. |
|
Deploying the application
- Make sure that the AMT Application Installer uses the right .config file. By default it uses the AmtProdInstall.config file located in the AmtTools\Prodinstall directory of the AMT-COBOL installation.
To specify a different .config file the /C: command line option can be used in the following format "/C:<Path specification>\<Filename>.config".
| If the application was made pre AMT44, data can also be read from the lion.ini file by clicking the 'import settings' button. Modifications to the configuration can also be manually made by changing the config file in any text editor. An example of a configuration can be found in the sample_AmtProdInstall.config file also located in the AmtTools\Prodinstall directory. |
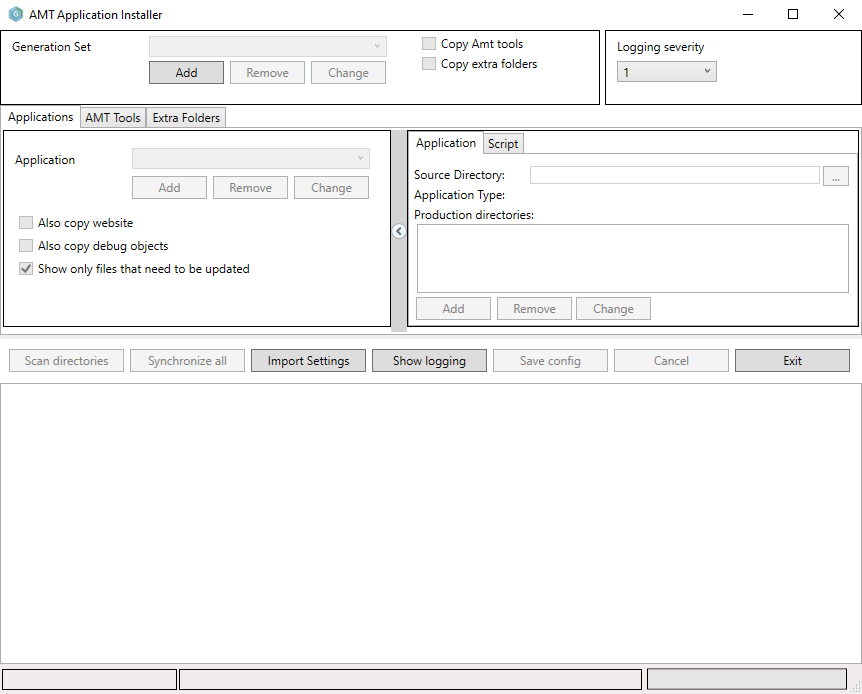
- Start the AMT Application Installer. The AMT Application Installer reads the source and production directories from the .config file of the selected generation set. The main dialog will open as shown below on first use.
Warning: The Application Installer should only be used in a single session. Otherwise, when copy tasks from different sessions are performed at the same time, the results become unpredictable.
- Select or add the desired generation set in the Generation Set panel. Generation Sets can be added, removed or changed by using the corresponding buttons, the dropdown menu will list all the Generation Sets currently in the config file.
- Set a Logging severity level. A logging severity level can be set per config file. The Logging severity dropdown menu offers a choice of the following logging levels:
- 1 - Logs basic information like the start and end times of the object groups synchronizations. This is the default level.
- 99 - Extensive logging where each object that is copied is individually mentioned. This level can result in large log files.
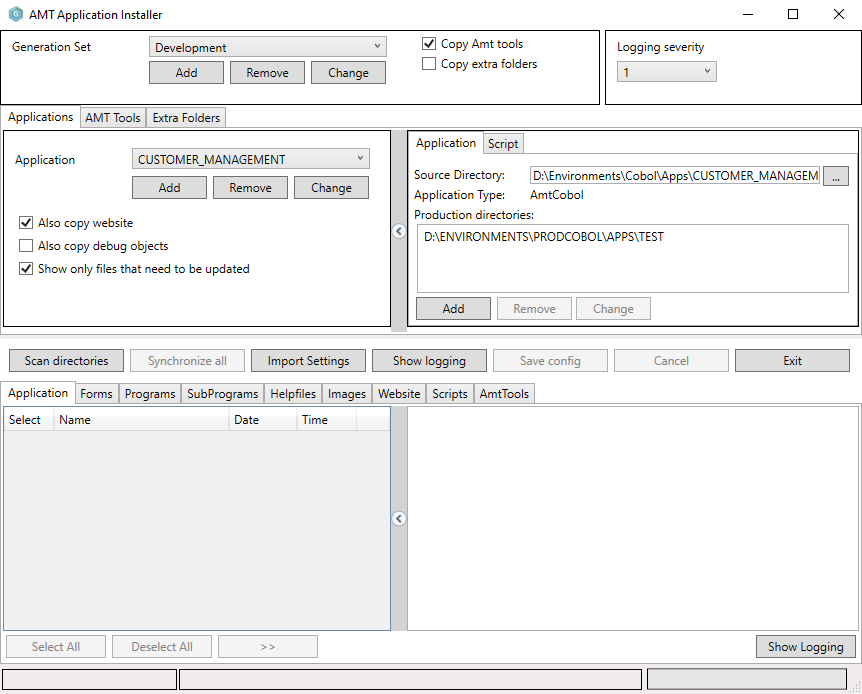
- Choose the application to use for deployment in the Applications panel. Applications can be added, removed or changed by using the corresponding buttons, the dropdown menu will list all the applications currently in the config file.
In the panel to the right the Source and Production directories of the application in the chosen generation set will be displayed.
The 'Source Directory' folder should be set to the folder containing the Binary files of the application (e.g. <AMT-environment>\Apps\<Application>\Binaries).
The 'Production directories' are the folders where the application will be installed to. They can be added, removed or changed by using the corresponding buttons.
The directories can also be UNC paths.
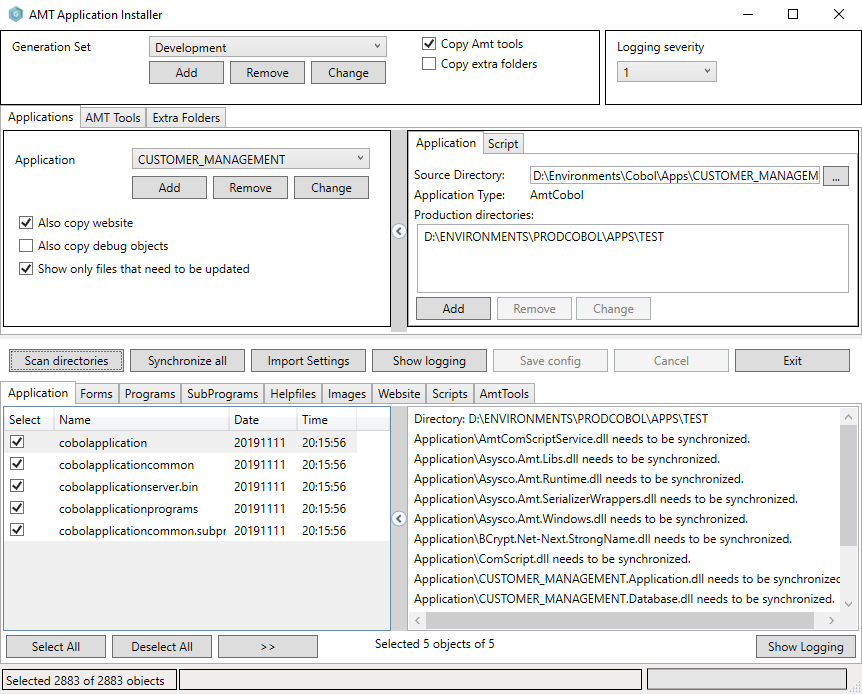
- Scan for objects to update by clicking the 'Scan directories' button. All the objects in the source and production directories and subdirectories will be scanned if the source version is newer than the production version. If so the newer objects will show selected in the list in the lower left as shown in the example below. A textlog of the scan results is shown in the lower right.
By checking the 'Show only files that need to be updated' only the objects with newer source version will show in the list.
By checking the 'Also copy debug objects' also the private debug versions of the objects will show in an extra tab in the object list and be selected if necessary.
By checking the 'Also copy website' the objects concerning the website will also be copied.
- When all the objects need to be deployed and/or a Reorganization is needed a warning popup will show. In that case click Ok and then click the 'Synchronize all' button to deploy the complete generated application.
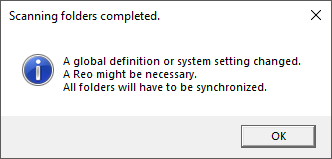
A complete deployment of the application by clicking 'Synchronize all' is only possible when all the application services have been stopped. I.e. (spare) appservers, (spare) appmanagers and (spare) comservers. Also perform a Reorganize before restarting the services.
- The different object types of the application can be shown by clicking the appropriate tab.
- Select or deselect objects to deploy. In the object list the individual objects can be selected or deselected by clicking the checkbox in front of the object. Also all the listed objects can be selected or deselected by clicking the 'Select All' or 'Deselect All' button.
- Number of objects. The number of objects available for deployment and the number of selected objects to deploy is visible for both the current subdirectory in the subdirectory tab and for the complete application in the bottom of the window.
- Deploy the selected objects by clicking the >> button. The objects selected to be deployed will be copied from the source directories to the production directories. It is advised to stop all services before the execution of this step, but when only scripts, reports or forms are deployed, this can be performed in a running production application. A verification if you really want to deploy the selected objects will pop up.

After clicking progress bar will show at the bottom of the window. After a successful deployment the following popup will show.
- When done click Exit. When no more deployment of generated sources is needed click the 'Exit' button to leave the Lion Production Installer.
Deploying scripts
To deploy the scripts from your application, the tab 'Script' should be set to the correct folders.
When the Source Directory and the Target folders have been set, the Scripts will be visible as tab and be deployed to the Target folders in the same manner as the other application objects.
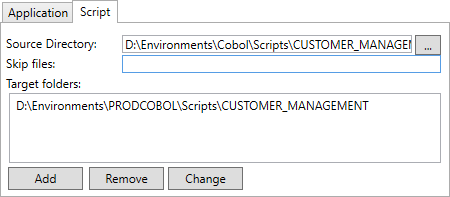
In the Source Directory field one folder containing your scripts can be added that should be deployed. Then you can add as many folders on different servers you have access to as needed to copy the scripts to as target folders. Script files that should not be deployed can be added to the 'Skip files' field by entering their filenames, separated by a semi-colon (;).
Deploying the AMT Tools
When the Copy Amt Tools checkbox has been checked and the AMT Tools tab has been selected the dialog below will be shown. This enables you to deploy the AMT Tools to the servers that will run the Control Center, Application Center an the various system services. When the Source Folder and the Target folders have been set, the Amt Tools will be deployed to the Target folders when the Synchronize all button is clicked alongside the deployment of the selected application.
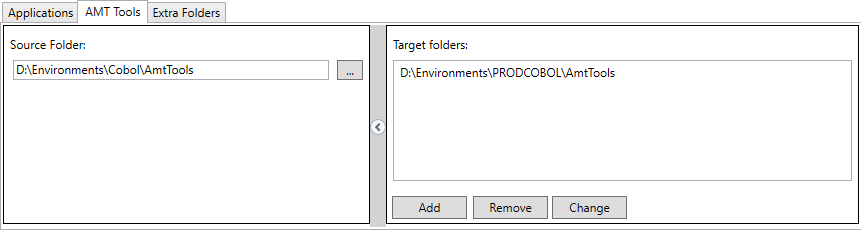
In the Source Folder Pane the folder containing the original Amt Tools should be entered. And in the Target folders pane you can add as many folders on different servers you have access to as needed to copy the Amt Tools to.
Deploying Extra Folders
When the Copy extra folders checkbox has been checked and the Extra Folder has been selected the dialog below will be shown. This enables you to deploy any folders of your own selection to one or more target folders. When the Synchronize all button is clicked all the Source folder shown in the list will be copied to the Target folders alongside the deployment of the selected application.
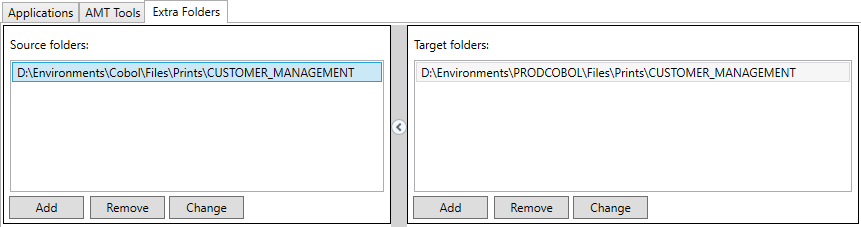
In the Source folders pane one or more folders can be added that should be deployed. Then for each source folder in the list one or more target folders can be added in the Target folders pane.