Configuring Blazor
As the final part of setting up Blazor it is necessary to change the encryption keys, authentication settings and connection settings in the appsettings.json files. Before we can change the keys required in these files, we need to generate the keys with the Setup tool. Learn how to generate these keys on the Generating Keys page. The generated keys should be copied to replace the default keys in the appsettings.json file. Please generate and use a unique key for each such setting.
| Regarding "AmtCookieEncryptionKey" |
|---|
| It is necessary for the "AmtCookieEncryptionKey" key to be the same as the other cookie encryption keys in your AMT environment, also found in the Application Center appsettings.json file. |
Blazor Client
- Navigate to the following directory for the Server client:
..\<AMT_Environment>\Apps\<APPLICATION>\Binaries\ClientBlazor\WebClient\Server.
- Copy the SAMPLE_appsettings.json file found in this directory and rename the copied file to "appsettings.json". warning Note: the filename must be in lowercase.
- Open the appsettings.json file
in a text editor and configure the settings listed below.
- In the Amt section:
- RuntimeBehaviour (set to "Cobol". Other available options are "Lion" or "Natural")
{ "Amt": { ... "RuntimeBehaviour": "Cobol", ... },
- In the Amt section:
- In the BlazorWebAPI section:
- Protocol - HTTP or HTTPS, if the wrong protocol is set the client will display an error that it is unable to connect to the API.
- Domain - set to the WebAPI application address without the protocol prefix
- Port - set to 0 for normal operations. Other values are used for debugging
... "BlazorWebAPI": { "Protocol": "Http", "Domain": "localhost/AMT/APPLICATION_WebAPI", "Port": 0 },
- In the AmtOIDC section:
- ClientId - The client ID of the application as configured in the OIDC Identity Provider.
- Authority - The URL of the OIDC Identity Provider endpoint.
- Scope - The scopes to request from the authorization server to allow access tokens to be used to call other resource servers (e.g. CC BL, AC BL or Blazor APIs)
- ClientSecret - The client secret of the application as generated in the OIDC Identity Provider, not applicable if client assertion is enabled.
- NameClaimType - The claim type that will be used to identify the user.
Commonly preferred_username is used as claim type.
The claim type must be identical to the claim type set in the Blazor WebAPI appsettings.
... "AmtOIDC": { "OIDC": { "ClientId": "amt-blazor-webclient-server", "Authority": "https://login.example.org/amt-applications/v2/auth", "Scope": "openid profile amt-blazor-webapi-scope", "ClientSecret": "c8A6L7j5E3N0n9Y", "TokenValidationParameters": { "NameClaimType": "preferred_username" } },
- In the CookieAuthenticationOptions section:
- Name - Name of the authentication cookie that will be used to store the identity token.
- SameSite - SameSite policy of the authentication cookie. Should be set to None if the application is
used in the AMT Application Center.
... "AmtOIDC": { ... "CookieAuthenticationOptions": { "Name": ".Amt.Blazor.ApplicationName.Auth", ... "SameSite": "None" } },
- Save the file.
Blazor WebAPI
The Blazor WebAPI handles communication between the Blazor client and the Transaction Server. Follow the steps below to begin configuring the WebAPI.
- Navigate to the following directory: ..\<AMT_Environment>\Apps\<APPLICATION>\Binaries\ClientBlazor\WebApi
- Copy the SAMPLE_appsettings.json file found in this directory and rename the copied file to "appsettings.json". Note: the filename must be in lowercase.
- Open the appsettings.json file in a text editor and configure the settings listed
below.
- In the Amt section:
- AmtCookieEncryptionKey - The AMT environment cookie key.
{ "Amt": { "AmtCookieEncryptionKey": "YGQ9zlT4noYK3O3+SnsbuNyalJMhGpXvZ3Zr82xgE8I=", "ApplicationName": "BlazorWebAPI", - In the Authentication section:
The Blazor WebAPI is a resource server that validates tokens received from the Blazor WebClients.- AuthenticationType - Set to "JWT" (JSON Web Token).
- Authority - Enter the URL of the authorization server.
- Audience - Set the configured intended recipient of the access token.
- NameClaimType - The claim type that will be used to identify the user.
Commonly preferred_username is used as claim type.
The claim type must be identical to the claim type set in the Blazor WebClients appsettings.
"Amt": { ... "Authentication": { "AuthenticationType": "JWT", "JWT": { "Authority": "https://login.example.org/amt-applications/v2/auth", "Audience": "amt-blazor-webapi", "TokenValidationParameters": { "NameClaimType": "preferred_username" } }
- AmtCookieEncryptionKey - The AMT environment cookie key.
- In the Amt section:
- In the BlazorAPI section:
- ConnectionType - Set to "TransactionServer".
- ConnectionAddress - Set the Transaction server address and port:
"GRPC:<server>:<port>".
"BlazorAPI": { "ConnectionType": "TransactionServer", "ConnectionAddress": "GRPC:NB1435:40102", ... }, ... }
- Save the file.
| Regarding "ConnectionType" |
|---|
| A LION application without a manager is of the type AppServer. Otherwise it is of the type
AppManager. The type TransactionServer is used for AMT-COBOL configurations and the type VsWebApi for VisualStudio environments. |
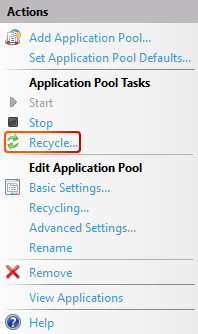
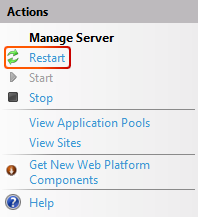
Restarting IIS
It is required to restart the relevant application pool after configuration of the appsettings.json files is complete for all Blazor web applications to function properly. Select the application pool that needs to be restarted and select the Recycle... button. Alternatively, restart the entire IIS server.
The final step is adding the web application to the Control Center.