Merging
The merging problem
The 3- and two way merging in the AMT Lion Developer Studio is best explained using an example. Let's imagine that developer PDV wrote code displaying numbers from one to 100 as shown in a program in the generation set Development.
move 1 to count.
perform startloop through endloop until count is 100.
go to 0000-main-exit.
startloop.
display count.
endloop.
0000-main-exit.
exit.
(revision 1.1)
Since there is no increment of count in the perform loop this is in effect an endless loop. But PDV does not see this, checks the program in (revision 1.1), imports the program into the generation set Testing and starts testing it.
Developer ESchutte finds the new program in Development and wants to also display the squares. He locks the object and adds the appropriate code to the program. He also detects the infinite loop and adds an increment of count, leading to the following code in the program.
move 1 to count.
perform startloop through endloop until count is 100.
go to 0000-main-exit.
startloop.
display count.
multiply count by count giving cntsquare.
display cntsquare.
add 1 to count.
endloop.
0000-main-exit.
exit.
(revision 1.2)
Meanwhile developer PDV has tested his report and detected the infinite loop. He wants to modify his code but finds the program locked in the generation set Development. He chooses not to wait until ESchutte has checked in his changes and creates a branch on revision 1.1 in generation set Testing. He decides to use a perform loop with varying instead of the previous written faulty perform loop.
perform startloop through endloop
varying count from 1 by 1 until count is 100.
go to 0000-main-exit.
startloop.
display count.
endloop.
0000-main-exit.
exit.
(revision 1.1.1.1)
He tests the new program and it works correctly. He then checks the changed program in creating the revision 1.1.1.1.
In the meantime also ESchutte has checked his changes to the code in, leading to revision 1.2.
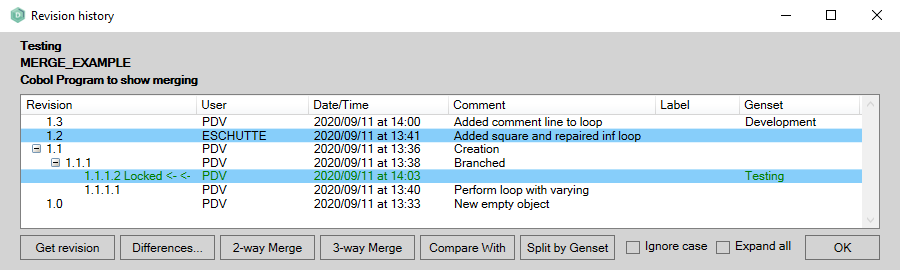
The revision history on this object now looks as follows.
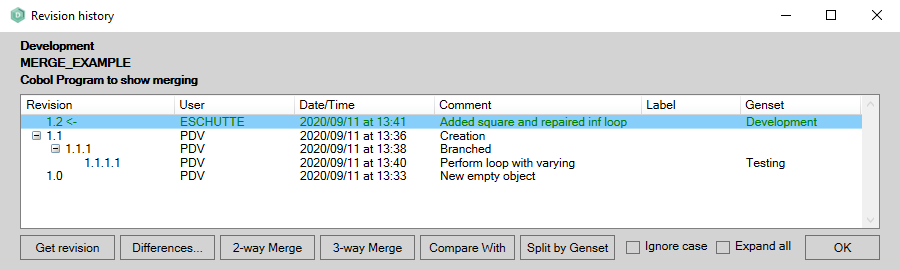
PDV and ESchutte have a discussion about this and decide that the loop solution in the branch is better than the one in the main revision, so they need to merge the loop solution in the branch revision 1.1.1.1 into the main stream revision 1.2.
Merging
AMT Developer Studio offers two types of merging. The 3-way merge and the 2-way merge.
The 3-way merge only allows you to merge changes made in a branch back into the main stream revisions.
The 2-way merge also allows you to merge changes made in the main stream revisions after the branch into the branched revisions. Also the source for merge does not need to be the latest revision in the main stream or branched revisions.
3-way Merge
To execute the 3 way merge, the main stream revision needs to be locked first (the merged result should go into a locked object). The history now shows the main stream revision locked.

Now select the branch to merge into the main stream revision as shown above and click the '3-way Merge' button. The following 3-way merge dialog will open:
The dialog will show a tab for the merge-able data kinds of the object. This will differ for each object type.
The items of the tabs that show green have no differences between the three shown versions and therefore do not require a merge action. In this example only the Implementation needs to be merged as shown in the figure above.
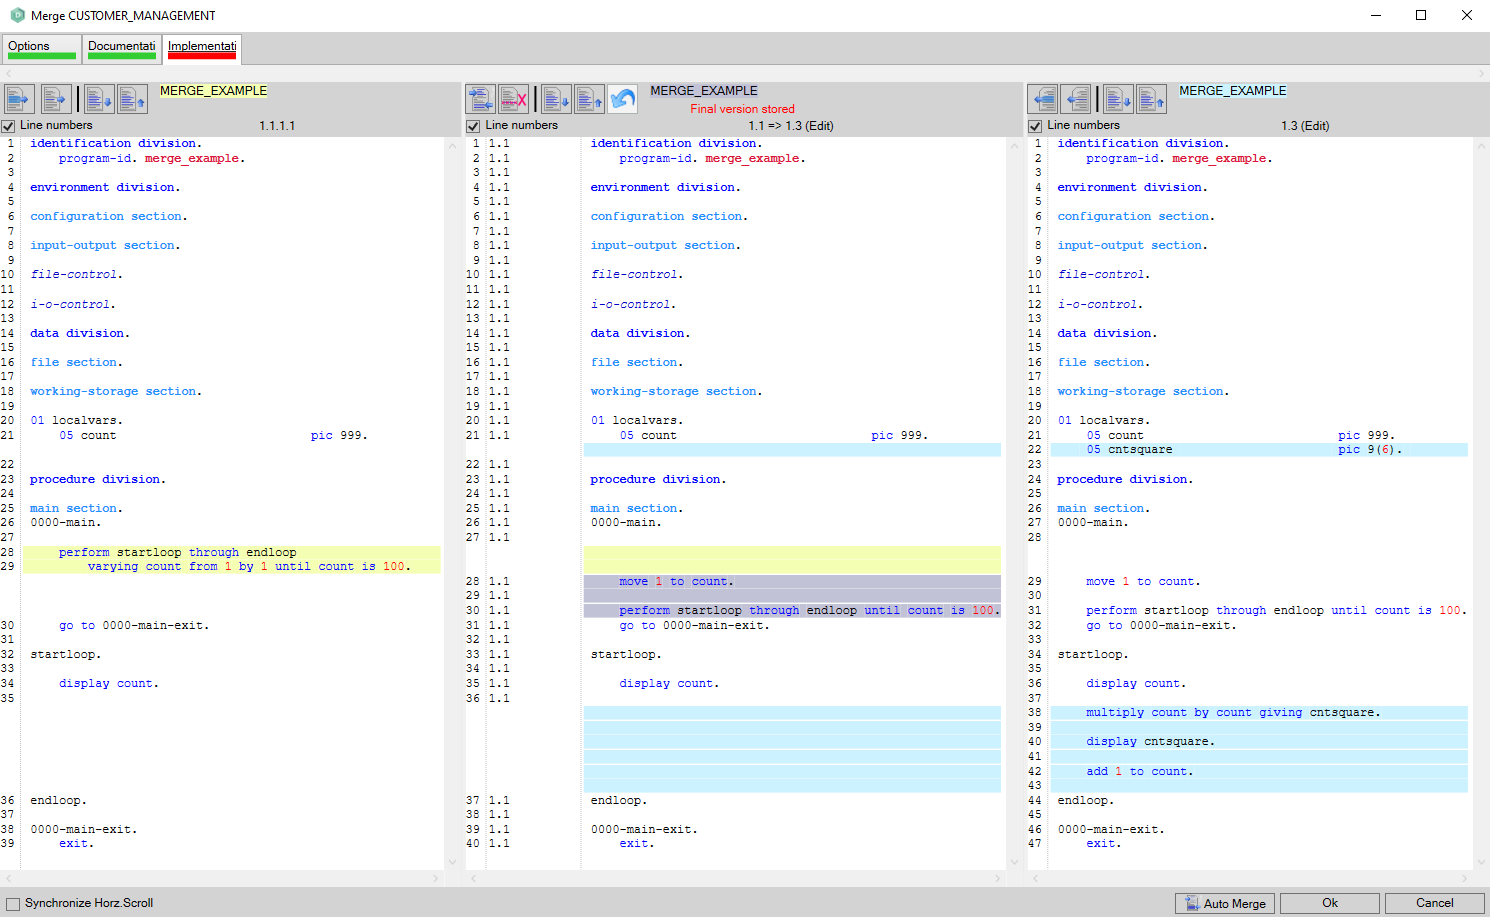
Three columns
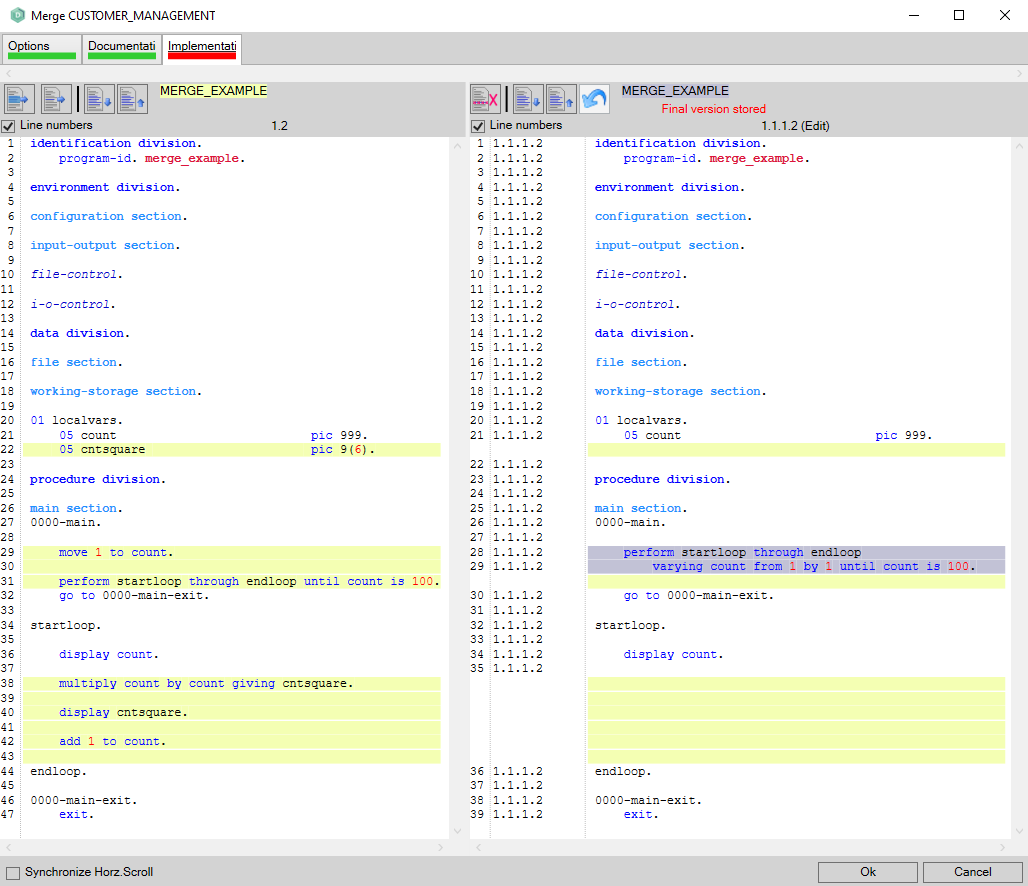
When the Implementation tab is selected, the dialog shows three columns with code. The center column shows the root of the branch (revision 1.1), the left column shows the version in the branch (1.1.1.1) and the right column shows the version that is locked (1.2 locked shown as 1.3).
| The most important thing to realize is that when the Ok button is clicked the version shown in the center column will be copied into the locked 1.2 revision. |
The version in the center column can be altered by deleting lines that are shown in grey, or adding lines from the left or right column when they differ. The position that they will have in the center column will show in either yellow (from the left column) or blue (right column).
The buttons for these actions are at the top of the columns and will state their function when the mouse pointer hovers over them.
There are two Auto Merge buttons in the dialog. One at the top of the center column and one at the bottom of the dialog. Be aware that their functions are very different. The button at the top of the center column will only execute an auto merge for the current data kind (tab) shown in the current columns. The button at the bottom of the dialog will execute an auto merge for all the data kinds (tabs) in the object. |
| When using auto merge be sure to check the merged result before saving it.The merged result is very likely not going to be perfect and further changes might be necessary. |
The correct merged code will then look as shown.
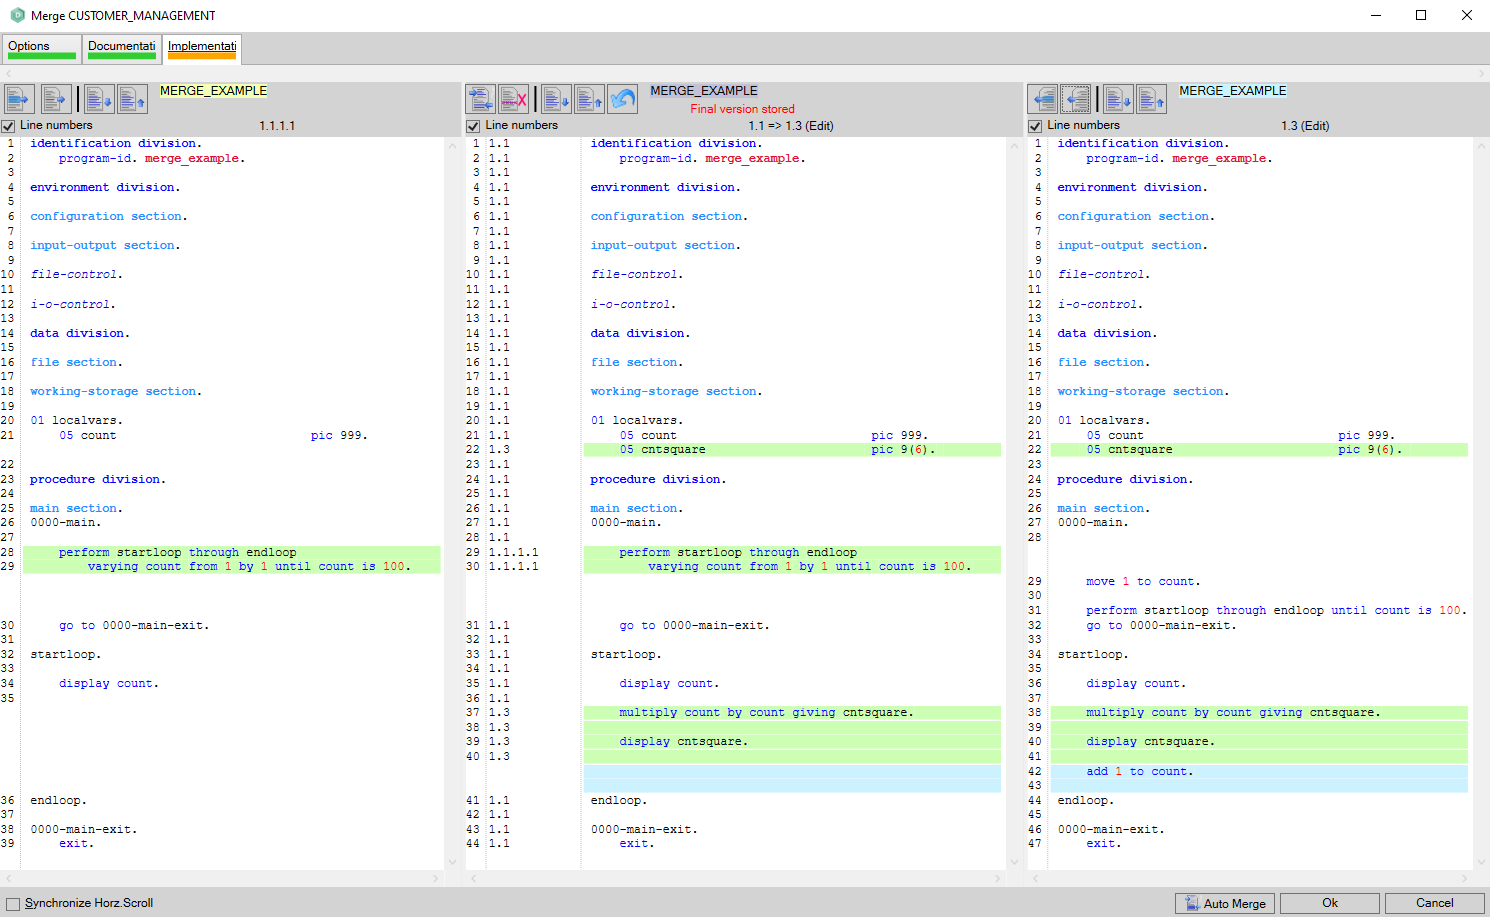
The tab of the merged data kind will turn orange after selecting a different tab.
2-way Merge
Let's suppose that PDV has made more extensive changes to the main stream revision 1.2 and checked the changes in, which leads to revision 1.3. The history will now look as:
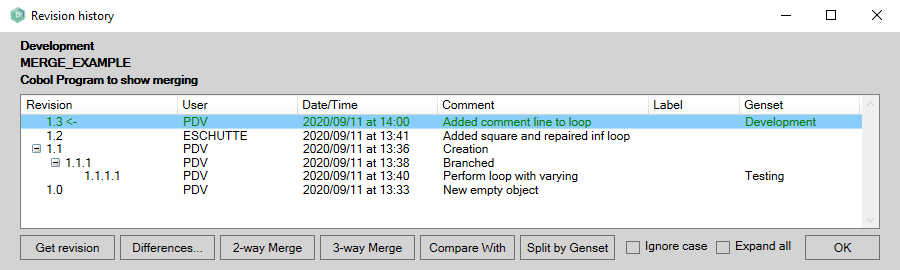
In revision 1.2 the square was added and now PDV wants to merge this into the branched revision 1.1.1.1 without merging all the extensive changes in revision 1.3.
To perform this merge, PDV first selects the generation set Testing and locks the branched version 1.1.1.1. He opens the history dialog of the object and first selects the source revision 1.2 with a left mouse click. He then also selects the locked destination revision 1.1.1.1 with CTRL-left mouse click. The history will now look as:
| The order of selection is important. The first selected revision will always be the source for the merge and can be any checked in revision in the history. The second selected revision will be the destination. It must be locked and in the current generation set for the merge to work. |
After the two revisions have been selected in the correct order, the '2-way Merge' button can be clicked which will open the 2-way Merge dialogue window.
Two columns
The 2-way Merge dialog shows two columns. On the left the source and on the right the destination. In the shown example for the Implementation data kind (code).
In the right (destination) column only lines of code in grey can be deleted with the delete button at the top of the column.
From the right (source) column lines or blocks of code can be copied into the destination column with the button at the top of the left column.
When the merge is complete (including other data kinds) the merged result in the destination columns will be copied into the locked revision by clicking the Ok button. The resulting locked revision will NOT be checked in, so the result can again be checked in the object editor before checking in.