
Adding the Websites Manually
AMT web applications consist of the Control Center and the Application Center. To add these web applications manually to the IIS, the following IIS applications need to be created:
| IIS Application | Description | Physical path* | Example Virtual Path |
|---|---|---|---|
| AMT Environment | The IIS application under which the AMT Web Application will reside. | \ | /AMT |
| ControlCenter | The front end application of the Control Center. | \AmtTools\ControlCenterCore | /AMT/ControlCenter |
| TransactionRendererBlazor | A support application to view transactions inside the Control Center. | \AmtTools\ControlCenterCore\TransactionRendererBlazor | /AMT/ControlCenter/TransactionRendererBlazor |
| ControlCenterBL | The back end application of the Control Center. | \AmtTools\ControlCenterWebAPI | /AMT/ControlCenterBL |
| ApplicationCenter | The front end application of the Application Center. | \AmtTools\ApplicationCenterCore | /AMT/ApplicationCenter |
| ApplicationCenterBL | The back end application of the Application Center. | \AmtTools\ApplicationCenterWebAPI | /AMT/ApplicationCenterBL |
*The Physical Path is relative to the System base path of the AMT environment.
Continue in the sections below to follow the steps necessary to add and configure these AMT applications.
Adding the Environment Web Application to the IIS
Follow the steps below to add a new environment application in IIS:
- Open the IIS Manager.
- Right-click Default Web Site and select Add Application....
- In the Add Application dialog, do the following:
- Enter an Alias name, such as "AMT".
- The Application pool can be left on the default DefaultAppPool, or a new application pool could be created and associated with this application.
- Set the Physical path to the Base Path of the AMT environment (..\AMT)
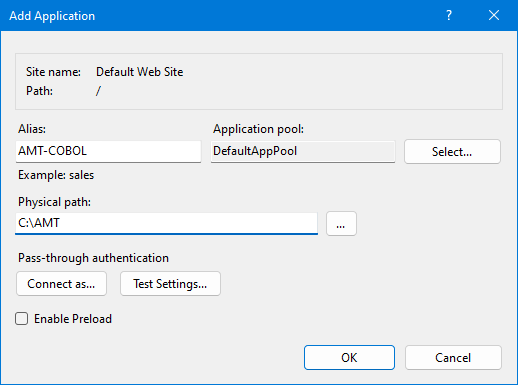
- Select the OK button to add the application.
Adding the Control Center and Application Center applications to the IIS
Follow the steps below to add the necessary applications for the Control Center and Application Center as well as their respective Application Pools in the IIS:
- Open the IIS Manager.
- Create a new Application Pool for the
application (such as the ControlCenter) using a .NET CLR version and set Managed Pipeline Mode to
Integrated. Create separate application pools for the following applications:
- ControlCenter
- ControlCenterBL
- ApplicationCenter
- ApplicationCenterBL
- Right-click the environment application created in the previous section, and select Add Application....
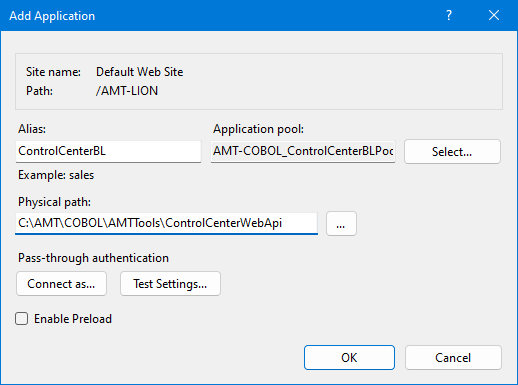
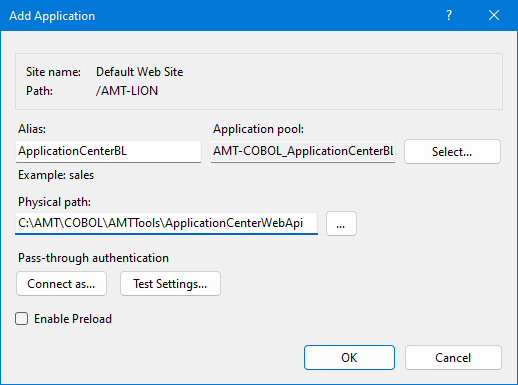
- In the Add Application dialog, do the following:
- Enter an Alias name (such as "ControlCenter" for the Control Center).
- Select an Application Pool created in step 2 to be associated with this application.
- Set the Physical Path of the application to its respective physical path. Use the
table
at the top of this page as a guide.
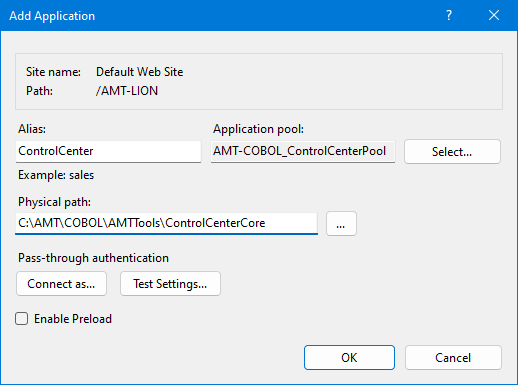
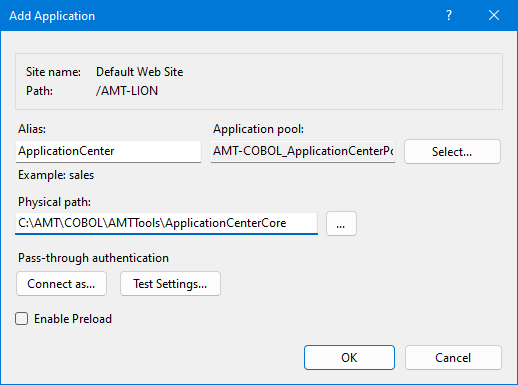
- Select the OK button to add the application.
- Repeat the above steps to create each application with their respective Aliases, Application Pools, and Physical
Paths.
Adding the transaction renderer blazor application to IIS
| Note |
|---|
| The TransactionRendererBlazor is the .NET core successor to the previous .NET Framework TransactionRenderer. |
Lastly, the Transaction renderer blazor needs to be created. Follow the steps below to add the Transaction Renderer Blazor to the Control Center application in the IIS:
- Open the IIS Manager.
- Create a new Application Pool for the Transaction Renderer using a .NET CLR version and set Managed Pipeline Mode to Integrated.
- Right-click ControlCenter created in the previous section and select Add Application....
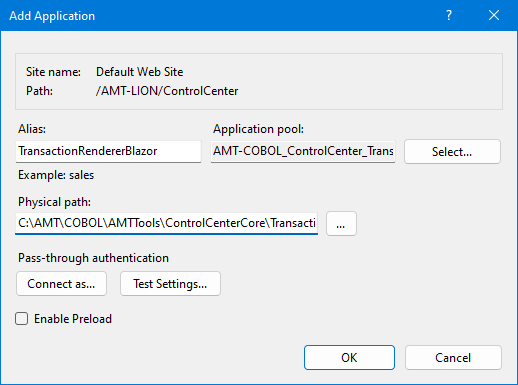
- In the Add Application dialog, do the following:
- Enter an Alias name, such as "TransactionRendererBlazor".
- Select the Application Pool created in step 2 to be associated with this application.
- Set the Physical path to the TransactionRendererBlazor directory
(..\AMT\AMTTools\ControlCenterCore\TransactionRendererBlazor).
- Select the OK button to create the application.
Creating and Configuring the appsettings.json files
If Setup is not used to automatically configure the appsettings.json files, a copy of the sample files first needs to be renamed and configured manually.
- Navigate to the following directory: ..\<AMT Environment>\AMTTools.
- Within this directory, find and open the SAMPLE_appsettings.json files found in the
following locations:
Appsettings File Directories ControlCenterCore ControlCenterCore\TransactionRendererBlazor ControlCenterWebApi ApplicationCenterCore ApplicationCenterWebApi - Save a copy of all five files with the name appsettings.json in their respective directories.
- Configure the files with the settings found below, under the subheadings ControlCenterCore and ApplicationCenterCore.
ControlCenterCore
In the appsettings.json file located in the \AmtTools\ControlCenterCore\ directory of the AMT installation, the "Address" setting of the "BusinessLogic" section should be set to the URL of the ControlCenterBL Web Application. In the same file the "Address" setting of the "TransactionRenderer" section should be set to the URL of the TransactionRendererBlazor Web Application.
For example:
"BusinessLogic": {
  "Address": "https://amtweb.contoso.local/AMT/ControlCenterBL"
},
"TransactionRenderer": {
  "Address": "https://amtweb.contoso.local/AMT/ControlCenter/TransactionRendererBlazor"
}
After setting the URLs, save and close the file.
ApplicationCenterCore
In the appsettings.json file located in the \AmtTools\ApplicationCenterCore\ directory of the AMT installation, the "Address" setting of the "BusinessLogic" section should be set to the URL of the ApplicationCenterBL Web Application.
For example:
"BusinessLogic": {
  "Address": "https://amtweb.contoso.local/AMT/ApplicationCenterBL"
}
After setting the URL, save and close the file.
Other settings found in these appsettings.json files will be explained in the following help pages.
Configuring Authentication
The authentication method needs to be set for web applications after the applications have been added to IIS Manager. Set up the authentication method for the Control Center and the Application Center by clicking on the authentication method below and follow the instructions on that page.
There is only one possible method to access the Control Center and Application Center.
- OpenID Connect (OIDC)
Authentication
If a user accesses Control Center or Application Center, they will be presented with a sign-in screen from the identity provider configured in the appsettings files.