
Adding Application Pools
You can add application pools in IIS Manager for web applications. An application pool groups one or more web applications and separates them from other applications. Warning We recommend creating a separate application pool for each application. An application in one pool cannot affect an application in a different pool. This separation is especially useful when an issue affects one application, because it helps prevent impact on other applications in different pools.
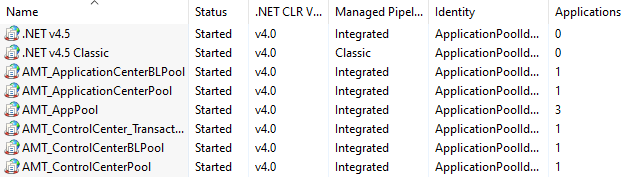
To view all existing application pools, in IIS Manager, select Application Pools for the IIS server in the left pane.
| Note |
|---|
| You can automatically add application pools for AMT applications later, after the AMT software is installed. |
Application Pools
In IIS Manager, right-click Application Pools in the left pane and select Add Application Pool....
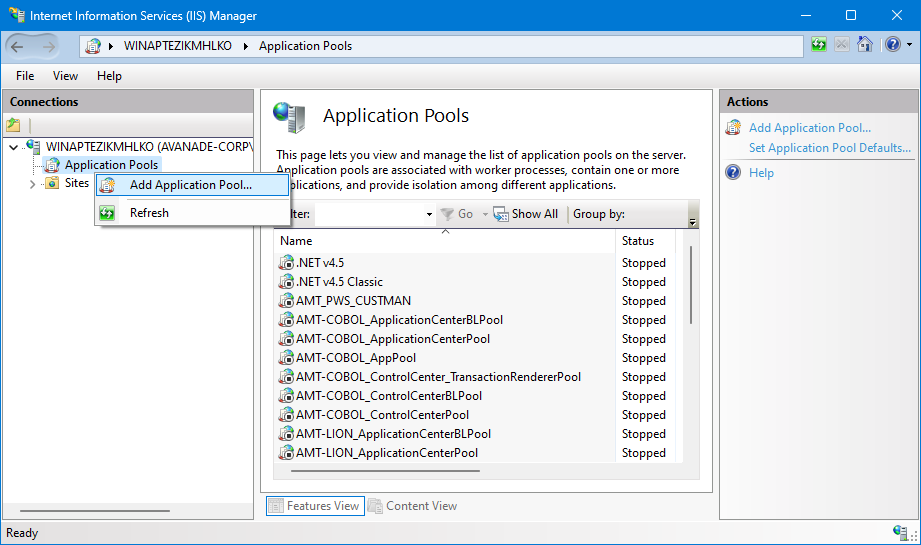
From here, you can add the required application pool for your application.
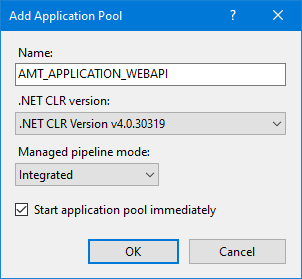
Description for each option:
- Name: Set the name for the application pool that appears in IIS Manager.
- .NET CLR version: Select the runtime to manage your code or select No Managed Code (the default .NET CLR version is 4.0. The Server client from Blazor should be set to No Managed Code).
- Managed pipeline mode: Integrated mode enables you to configure managed modules for websites that are developed with unmanaged code.
- Start application pool immediately: When this box is checked, the application pool starts automatically without requiring manual activation.
Several application pool settings in the AMT environment must be changed. To access these application pool settings, click on the application pool you want to change and select Advanced Settings.... The window shown in the following image will then appear:
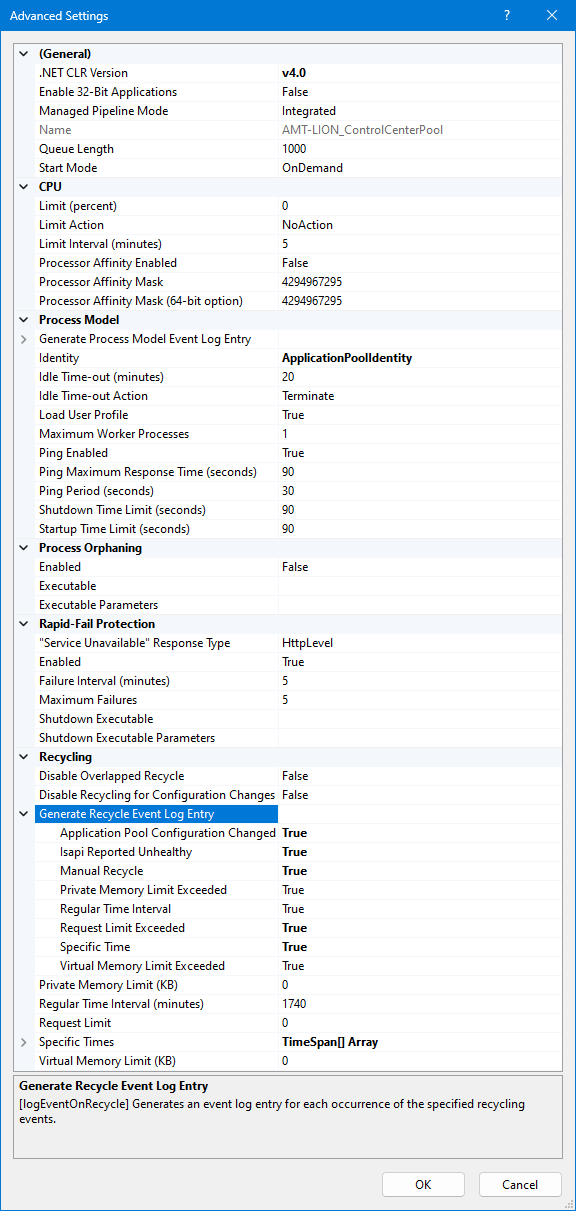
Check the following settings in this menu and update them when necessary.
- The Identity to be used for the application pool should ideally be set to an account that has access to both the AmtTools directory and the database.
- The Idle-Timeout should be set to 300 minutes.
- All settings in the section Generate Recycle Event Log Entry should be set to True for debugging.
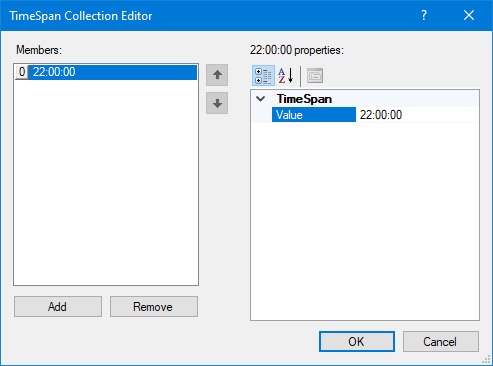
- Add an element in the Specific Times section with the time set to 22:00:00 (see the instructions below to learn how to do this).
To add an element (we will use the Specific Times section in our example), select the section you want to edit and notice that a small button with three dots appears.

Click this button and a new window appears, where it is possible to add or remove a value. Select Add and change the value to 22:00:00, then select OK.
Now, the new element with its value appears in the Specific Times section.