Adding Provided REST API Applications
Creating an Application Pool for the Provided REST API in IIS
Before adding the application, a separate Application Pools for each of the Provided REST APIs should be created.
To add a new Application Pool in the IIS Manager, right click on Application Pools in the pane on
the right side and select
Add Application Pool....

See the 'Adding REST API Application
Pools' page for more information about adding Application Pools for Provided REST API.
Adding An Application in IIS
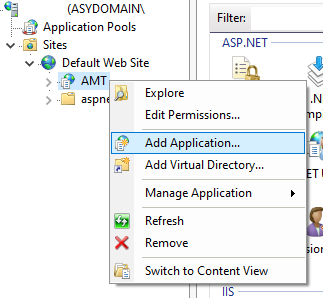
From within the IIS Manager an application should be added for each Provided REST API to your environment. To do so,
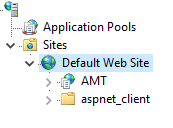
expand your main Web Site (in our example it is called "Default AMT Web Site"), then right click on
AMT and select Add
application.
Set the Alias name that will identify the API and set the Application Pool to the corresponding AMT application pool created in the previous section for the API.
The path should be set to the API directory inside the common/RestApiProvider folder of the generated AMT Application. For example:
| Alias: | CM_REST |
| Application pool: | AMT_CM_REST |
| Physical path: | C:\AMT\Apps\CUSTOMER_MANAGEMENT\Binaries\Common\RestApiProvider\PRA_CUSTOMER |
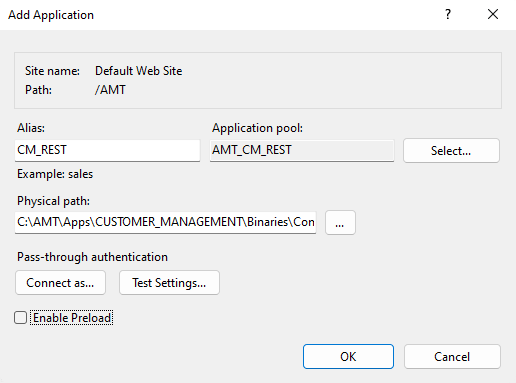 |
| Adding an REST API application |
Configuring Authentication in IIS
After adding the REST API application, the Authentication need to be configured for the Provided REST API inside IIS.
Select the newly created application in the IIS Manager and open Authentication (found in the middle pane) and set up as follows:
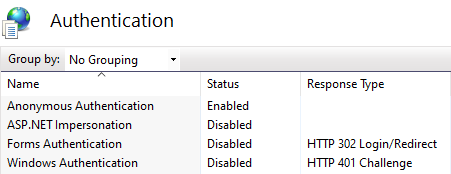
For OIDC Authentication, only the Anonymous Authentication needs to be set to Enabled and the other forms of authentication need to be set to Disabled.