Adding the Application server in the Control Center
Follow the steps below to add an Application server.
- Navigate in the Control Center to the System Configuration → Services → Lion services tab.
- Click on the Add button. A window called "New Lion server" opens.
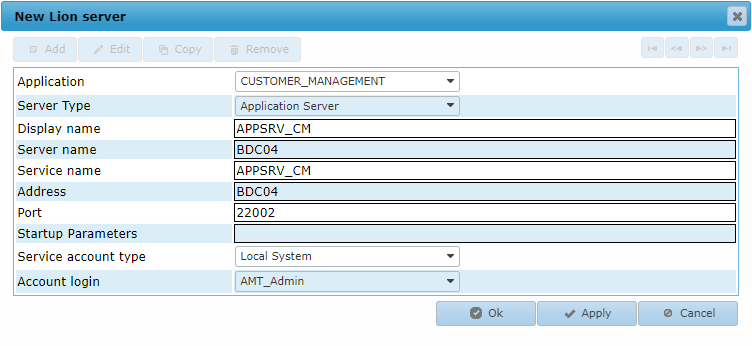
- Configure the Application server. See the explanation for each field below:
- Application: Select the generated application.
- Server type: Select the Application server option from the list.
- Display name: Enter a name for the Application server.
- Server name: Enter the Windows name of the server on which to install the Application server.
- Service name: Enter a name for the Windows service used for this Application server.
- Address: Enter the network name of the server on which to install the Application server, or enter the IP address of the server.
- Port: Set to a free TCP/IP port for the Application server.
- Startup parameters: This can be left empty for a basic runtime environment.
- Service account type: This can be left set to Local system.
- Account login: Select the account to use. The default login account is pre-selected.
Firewall If the server on which the Application server is installed has a firewall, the ports used for the Transaction server need to be opened for incoming TCP calls from machines that access the Transaction server.
- Click the Ok button to save the Application server information in the Control Center.
Installing the Lion server as a Windows Service
In the Lion servers tab, the newly added Application server is shown in the list.
- Select the Application server and click the (De)Install button.
- In the installation window that opens, click the Install service button to install the
Transaction server as a Windows service.
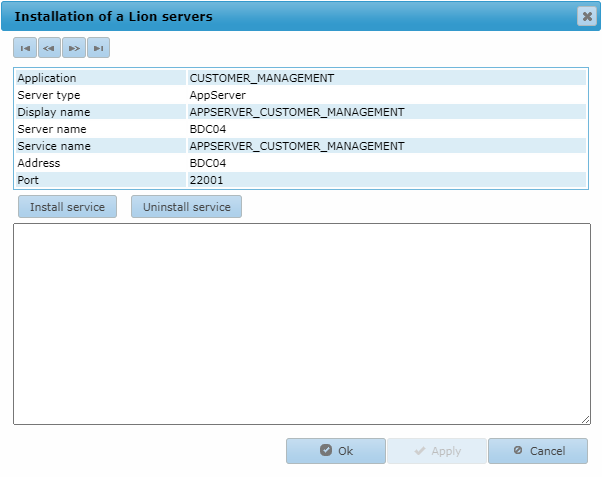
For more information about installing Lion servers, visit the LION Servers page.
Selecting the Application Server
After the Application Server is installed, it can be assigned to an application.
- Navigate in the Control Center to the System Configuration → Architecture → Applications tab.
- Select the application and click the Edit button.
- In the configuration window that opens, select the Lion properties → Servers tab.
- Select the Application server made previously and click the Ok
button.
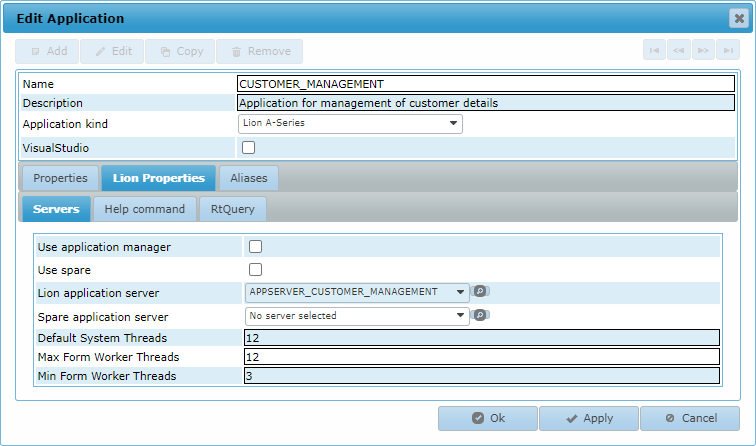
For more information about an Application's configuration, visit the Applications page.