AMT Help Files

Adding the Application in the Control Center
Follow the steps below to start adding an application to the Control Center:
- In Control Center, navigate to System Configuration → Architecture and then to the Applications tab.
- Select the Add button to add an application. The following dialog window appears:
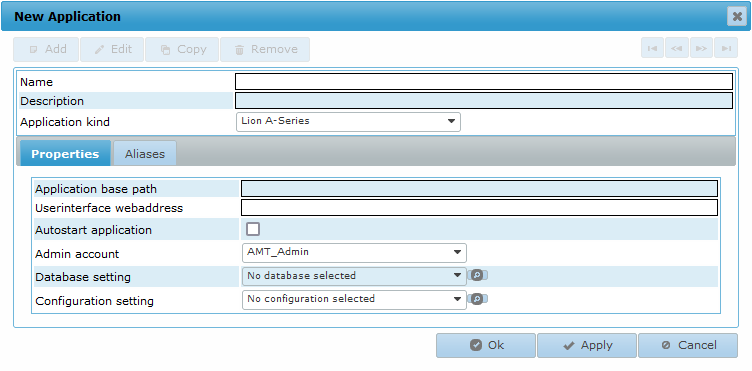
- Fill out the following basic information:
- Name: The name of the application exactly as it is used in the AMT Developer Studio. This name is also used in the environment variable %APPNAME%, which refers to the application directory in which the application has been generated.
- Description: A free-form description for the application.
- Application Kind: This should be set to LION and the mainframe operating system
from which the application was migrated for an AMT application.
Note The application kind can also be found in the AMT Developer Studio under Application Origin in the Application options of the application.
- Then, in the Properties tab of this dialog, fill out the following application settings:
- Application base path: The complete path to the base folder of the application. The
following environment variables can also be used:
- %SYSROOT% — the system basepath as entered in the base setup.
- %APPNAME% — the name of the application as entered in the name field of this window.
- Userinterface webaddress: The web address of the application website. We recommend including the trailing slash when pointing to the client folder of the application. This field cannot be left empty, even if only AMT Screens will be used.
- Autostart application: When enabled, this application will autostart in the Application Center. Only one application can start automatically.
- Admin account: The Login Account to use for this application.
- Database setting: Select the database to use for this application.
- Configuration setting: Select the configuration set to
use for this application.
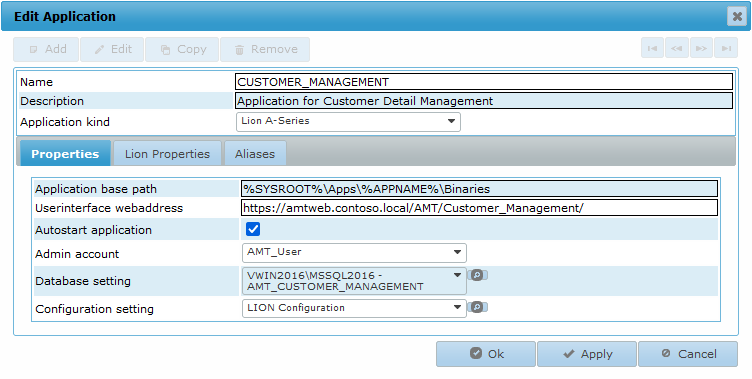
- Application base path: The complete path to the base folder of the application. The
following environment variables can also be used:
- Adding the application to the Control Center is now complete. Now, the security roles for the application need to be configured.
Visit the Applications page for more information about application settings.
Security Roles
The security settings for the application need to be configured before further configuration of the application can be done. The application needs to be added to the administrator role. Follow the steps below to accomplish this:
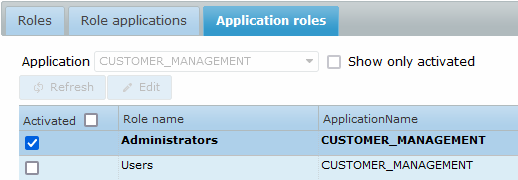
- In Control Center, navigate to Security → Roles and then to the Application roles tab.
- Select the application from the drop-down list and then select the Edit button.
- Enable the Roles to which the application should be added and select Apply at
the bottom right of the page.
Visit the Roles help page for more information about Roles and Application Roles.