Triggers
DML (data manipulation language) triggers on tables can be created in the AMT Developer Studio from the 'Triggers' node available in Database Table objects.
| Triggers can only be used in combination with the Reorganization program, not the older reo program. |
Creating a trigger
To create a new trigger, do the following:
- Open the table definition on which you want to define the trigger and select the "Triggers" node.
- Ensure that the table is locked by selecting the lock button in the top toolbar.
- Select the option "Add new trigger" from the right-hand pane. The following screen appears:
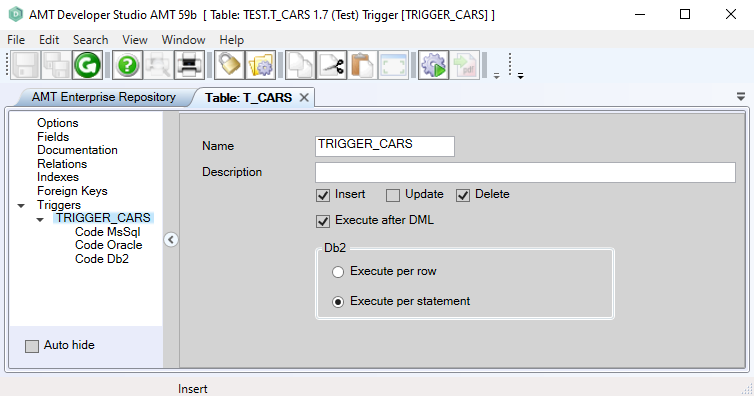
- To complete the specification, see "Adjusting a trigger" below.
Adjusting a trigger
- Select the trigger you want to adjust from the "Triggers" node.
- Ensure that the table is locked by selecting the lock button in the top toolbar.
- Set the properties for the trigger as described below:
|
Option: |
Description: |
Value: |
|---|---|---|
|
Name |
Name of the trigger. |
<Text> |
|
Description |
Description of the trigger. |
<Text> |
|
DML action |
Select the DML action(s) that executes the trigger. Multiple actions can be selected if supported by the database type used in your runtime environment. |
<Insert|Update|Delete> |
|
Execute after DML |
If checked, the trigger will execute after the DML action has been performed. If not checked, the trigger will execute before the DML action. |
|
|
DB2 - Execute per row - Execute per statement |
For DB2 databases only: Please note that this option is dependent on which type of database is used in your runtime environment:
|
|
- The trigger SQL code can be set in one of the code nodes belonging to the correct database type, see the code help page for more information.
- On completion, click the save button in the top toolbar of the Developer.
- The table must be checked in first before it can be generated.
Deleting a trigger
- Open the table definition on which you want to adjust the trigger and select the "Triggers" node.
- Ensure that the table is locked by selecting the lock button in the top toolbar.
- Select the trigger to delete and right-click on it, then select "Delete" from the pop-up menu (or press Delete on the keyboard).
- On completion, click the save button in the top toolbar of the Developer.
- The table must be checked in first before it can be generated.
Generate the application and reorganize the database
After a trigger is added, adjusted or deleted, a Whole System generate is required, followed by a database reorganize.
| Triggers that were manually disabled, will be re-enabled by a database reorganize only when the columns
in the triggers have been changed. Unchanged triggers will not be re-enabled by a database reorganize. |
In the code nodes, the SQL code of the trigger can be set.