Installing the Basic Services
This page guides through the process of adding the Basic Services that are necessary to run jobs in the AMT environment.
See the page Controlling Services from a User Account to install services from a normal Windows User Account.
File Controller
A File Controller is a service that performs all file Input/Output operations.
| The Windows account used to start a File Controller service must be an account with access to all directories on all servers where files will be read and written. This includes Extract, Print, Log, Image, Listbox, and the Form Help files. |
- Navigate in the Control Center to System Configuration → Services and select the File services tab.
- Select the Add button to add a new File Controller.
- Configure the settings for the new service. The image below displays an
example of a configured File Controller service.
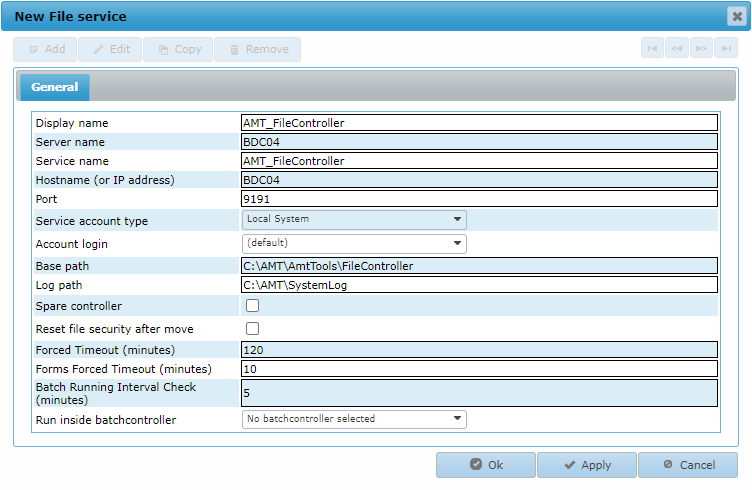
- Select the Ok button to add the File controller and close the window.
- Select the newly added service from the list and then select
the (De)Install button.
install.png)
- In the new window that opens select the Install service
button to install the File Controller as a Windows service.
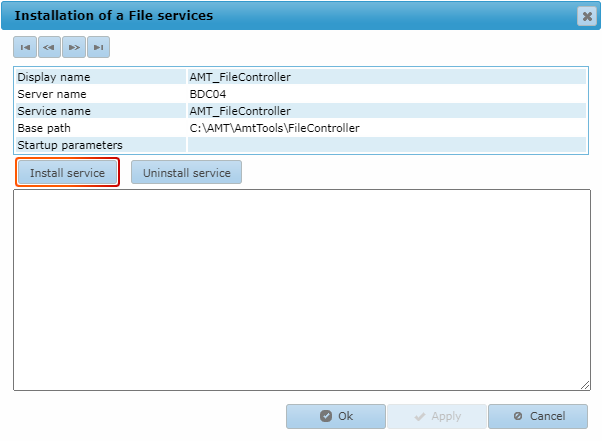
- Select the Ok button to close this window.
| Only one File Controller and one Spare File Controller (for failover) can be installed in an AMT environment. |
See the File Services page for more information.
Batch Controller
A Batch Controller is a service that performs the execution and running of jobs.
- Navigate in the Control Center to System Configuration → Services and select the Batch services tab.
- Select the Add button to add a new batch controller.
- Configure the settings for the new service. The image below displays an example
of a configured Batch Controller service.
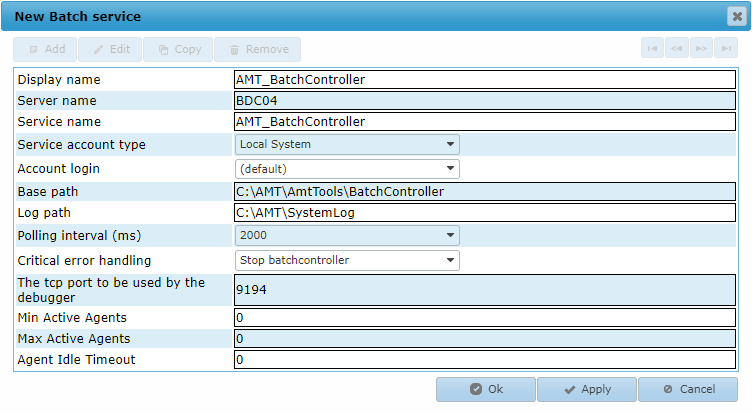
- Select the Ok button to add the Batch Controller and close the window.
- Select the newly added service from the list and then select the (De)Install button.
install.png)
- In the new window that opens select the Install service button to install the BatchController
as a Windows service.
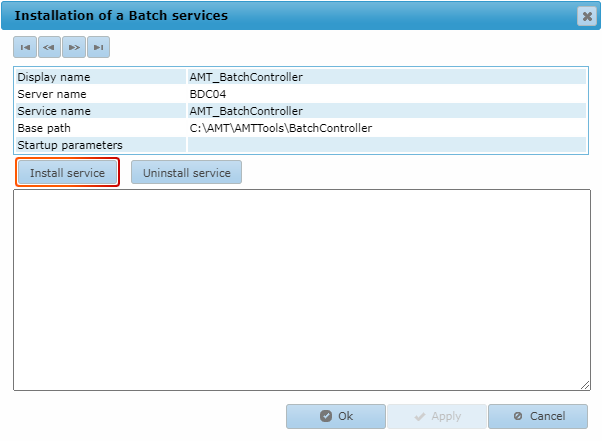
- Select the Ok button to close this window.
See the Batch Services page for more information.
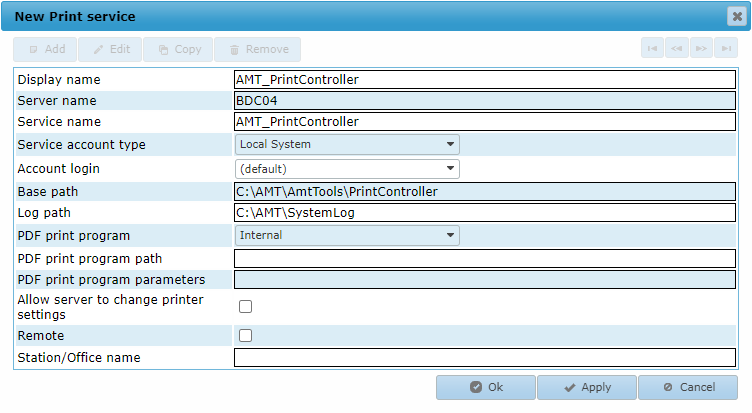
Print Controller
A Print Controller is a service that performs all printing that a job assigns to it.
- Navigate in the Control Center to System Configuration → Services and select the Print services tab.
- Select the Add button to add a new Print Controller.
- Configure the settings for the new service. The image below displays an example of a configured Print Controller
service.
- Select the Ok button to add the Print Controller and close the window.
- Select the newly added service from the list and then select
the (De)Install button.
install.png)
- In the new window that opens select the Install service
button to install the Print Controller as a Windows service.

- Select the Ok button to close this window.
| If the setting Service account type is set to Local System, then only printers installed as Local Printer will be accessible to the Print Controller. |
See the Print Services page for more information.
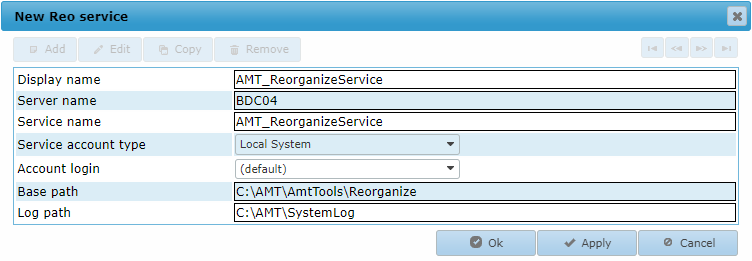
Reorganize Service
A Reorganize Service is an optional service that performs database structure changes to the system and application databases. Use this service in environments that are not authorized to connect to a database, to instead run the reorganization of the database through a server.
- Navigate in the Control Center to System Configuration → Services and select the Reorganize services tab.
- Select the Add button to add a new Reorganize service.
- Configure the settings for the new service. The image below shows an example of a configured Reorganize
service.
- Select the Ok button to add the Reorganize service and close the window.
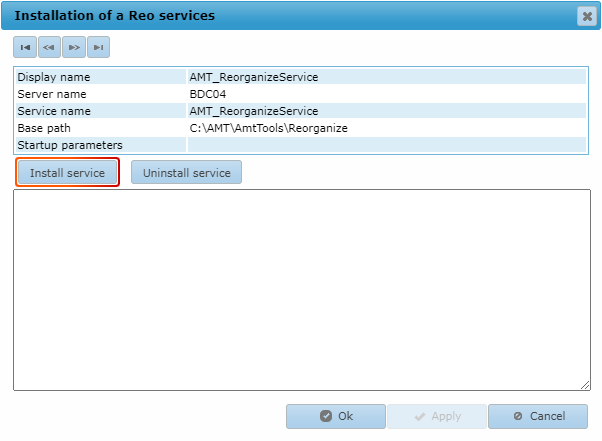
- Select the newly added service from the list and then select the
(De)Install button.
install.png)
- In the new window that opens select the Install service button to install the Reorganize
Service as a Windows service.
- Select the Ok button to close this window.
- Navigate to the following directory: <AMT Environment>\AmtTools\Reorganize.
- Copy the Sample_appsettings.json file found in this directory and rename the copied file to appsettings.json.
- Open the file in a text editor and configure the following setting to contain a server and a port:
The server should be set to the hostname of the machine where the Reorganize Service will be running, and the port should be set to a free port number for the service."ReoServiceAddress": "<Server>:<Port>",
Example: "ReoServiceAddress": "BDC04:9196",
- Save the file.
See the Reorganize Services page for more information.
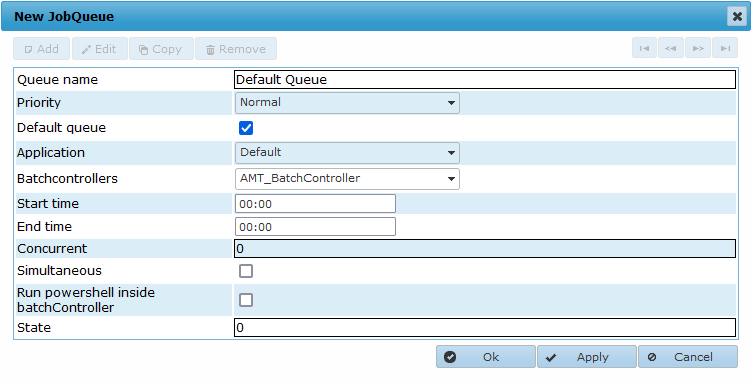
Job Queue
A Job Queue controls when and in what order jobs are executed. It is required to have at least one Job Queue to execute jobs
- Navigate in the Control Center to System Configuration → Batch & Forms and select the JobQueues tab.
- Select the Add button to add a new Job Queue.
- Configure the settings for the new queue. A free to choose name can be used for the Queue
name, but it is suggested to use the name "Default Queue" or "Default Job Queue". The image below
shows an example of a configured Default Job Queue.
- Select the Ok button to add the Job Queue and close the window.
See the Job Queues page for more information.
Print Queue
A Print Queue controls when and in what order prints are started. It is required to have at least one Print Queue to print.
- Navigate in the Control Center to System Configuration → Printers and select the PrintQueues tab.
- Select the Add button to add a new Default Print Queue.
- Configure the settings for the new queue. A free to choose name can be used for the Queue name,
but it is suggested to use the name "Default Queue" or "Default Print Queue" The image below shows an example of
a configured Default Print
Queue.
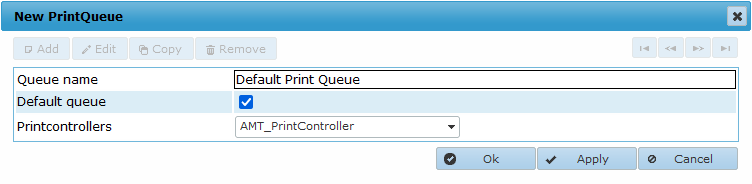
- Select the Ok button to add the Default Print Queue and close the window.
See the Print Queues page for more information.
Default Printer
A Printer controls how and where a print is printed. It is required to have at least one Printer to print.
- Navigate in the Control Center to System Configuration → Printers and select the Printers tab.
- Select the Add button to add a new Default Printer.
- Configure the settings for the new queue. The image below shows an example of a configured Default
Printer.
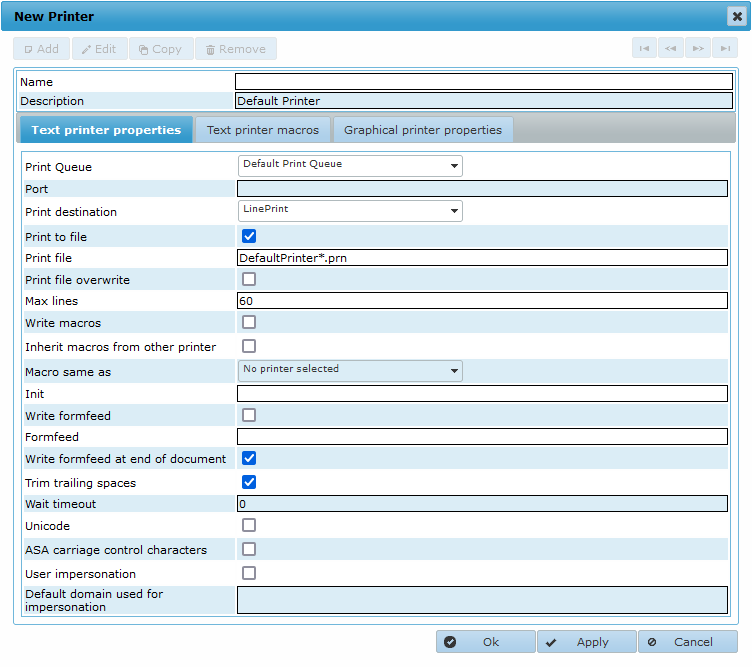
- Select the Ok button to add the Default Queue and close the window.
See the Printers page for more information.
Starting Services
After installing the Windows services as shown on this page, the services can be started as described in the steps below:
- Navigate in the Control Center to Applications → Server Control.
- Start the services by selecting the System node and clicking on it with the right
mouse button, then select Start all servers.

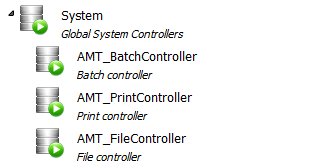
All services should start, as indicated by the red squares turning into green circles with an arrow inside of it.
Note: As the Reorganize Service is an optional service, it won't start automatically but can be started manually by right clicking on its node.
See the Server Control page for more information.